Blog Ideas Generator
Blog Ideas Generator with TextPixAI: Step-by-Step Guide
In this article, I will walk you through comprehensive and easy step-by-step guide on how to generate blog ideas for your website. These steps are explained as follows:
Step 1: Sign Up/Login
-
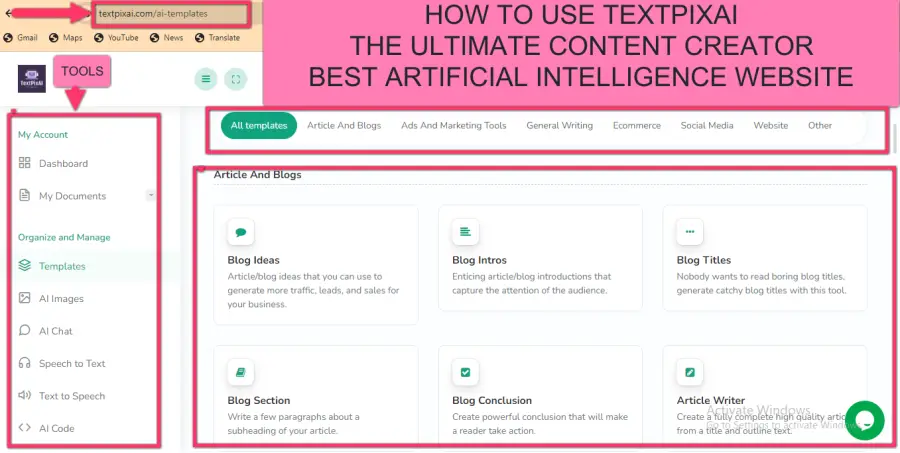
Visit TextPixAI Website: Open your preferred web browser and go to https://textpixai.com/ai-templates/blog-ideas.
-
Create an Account: If you are new to the website, you will need to click on the "Sign Up" or "Register" button to create a new account. Fill in the required information, such as your email address and a password. Follow any additional prompts to complete the registration process. The most easiest method of signing up is by clicking on the 'Login via Facebook' or 'Login via google' box. You will be directed to choose the email you wish to use and join. You can now confirm your email and you are now a member.
-
Existing Users Login: If you already have an account, you will need to click on the "Login" button and enter your credentials—email and password. You might also have the option to log in using your Google account or Facebook credentials.
Step 2: Go to the Blog Ideas Generator
-
Dashboard: After logging in, you will likely be directed to your dashboard. Look for an option or tab labeled "Blog Ideas Generator" or a similar feature.
-
Access the Tool: Click on the tool to open the Blog Ideas Generator. This is where you will input your preferences and receive creative blog ideas.
Step 3: Define Your Blog Niche and Preferences
-
(What is your blog is about?) Select Niche: Specify the niche or topic for your blog. This could be related to your interests, industry, or the type of content you want to create.
- Language: Choose your preferred language
- Quality type: Specify the quality of the output. You can select any of the following options: Economy, average, good, and premium
- Tone of Voice: Set the tone of the output. You can select funny, casual, excited, professional, witty, sarcastic, feminine, masculine, bold, dramatic, gumpy, or secretive.
- Number of Results: The number of results you may want. This ranges from 1 to 5.
- Max Results Length: You can determine (choose) the number of words you will need for the article.
Step 4: Specify Keywords or Topics
- Enter Keywords: If you have specific keywords or topics in mind, enter them into the designated field. This helps the AI generate ideas that align closely with your intended content.
Step 5: Generate Blog Ideas
-
Initiate Generation: Once you have set your preferences and inputted relevant details, find the "Generate" button and click on it to prompt the AI to generate blog ideas for you.
-
Review the Suggestions: The tool will present you with a list of blog ideas. Review them to see which ones resonate with your goals and interests. The AI might offer a variety of ideas based on your preferences and the specified keywords.
Step 6: Refine and Customize
- Edit or Refine Ideas: Feel free to edit or refine the generated blog ideas to better suit your vision. You can combine ideas, tweak the wording, or add specific details to make them more tailored to your content strategy.
Step 7: Save or Export
- Save or Download Ideas: Once you are satisfied with the generated blog ideas, you should have options to save or download the list as Msword. This might be in a document format or directly to your account on the TextPixAI platform.
Step 8: Use the Ideas to Plan Your Content
-
Organize and Plan: Take the generated blog ideas and use them to plan your content calendar. Assign topics to specific publishing dates and start outlining your articles based on the suggestions.
-
Implement on Your Blog: Begin creating and publishing blog posts based on the ideas you generated. Use the AI-generated suggestions as a foundation for your content strategy.
Congratulations! After doing all these, you have successfully utilized TextPixAI to generate creative and tailored blog ideas for your content. Now, I want you to remember that the specific steps may vary based on the actual features and functionalities of our passionate AI tool (TextPixAI made for you) or any other tool you are using. You can easily connect with us via our chat tool on the website dashboard to seek for detailed guidance. Thank you for checking on us, hope you enjoy our variety of tools.